

How To Install Pihole On Windows

Pi-Hole is a Linux network-level advertisement and Internet tracker blocking application which acts every bit a DNS sinkhole (and, optionally, a DHCP server), intended for use on a private network. What is a DNS sinkhole? A DNS sinkhole, also known as a sinkhole server, Internet sinkhole, or Blackhole DNS is a DNS server that gives out fake information, to preclude the use of a domain proper noun. Information technology is designed for use on embedded devices with network capability, such as the Raspberry Pi, but it can be used on other machines running Linux like Synology NAS and cloud implementations. Pi-Hole has the ability to cake traditional website adverts as well as adverts in anarchistic places, such as smart TVs and mobile operating organisation adverts.
I'thousand not a fan of applications like Pi-hole because Advertizing blocking software is leading to 'the slow expiry of niches' like my website. Advertising blockers are white flagging Google, Amazon, Facebook and other Internet giants, simply what most the small and medium publishers whose livelihood depends on advertizement revenues? Where is the morality in this? Anyhow, my web log has no ads. See below my step past step guide on how to install Pi-Hole on your Synology NAS device. If y'all adopt AdGuard over Pi-Hole read my stride past step guide on How to install AdGuard on your Synology NAS using docker.
Note: This guide works perfectly with the latest version of Pi-Pigsty 5.9 and DSM 7
-
STEP 1
Delight Support My work by Making a Donation.
-
Footstep 2
Install Docker via Synology "Package Center".

-
STEP 3
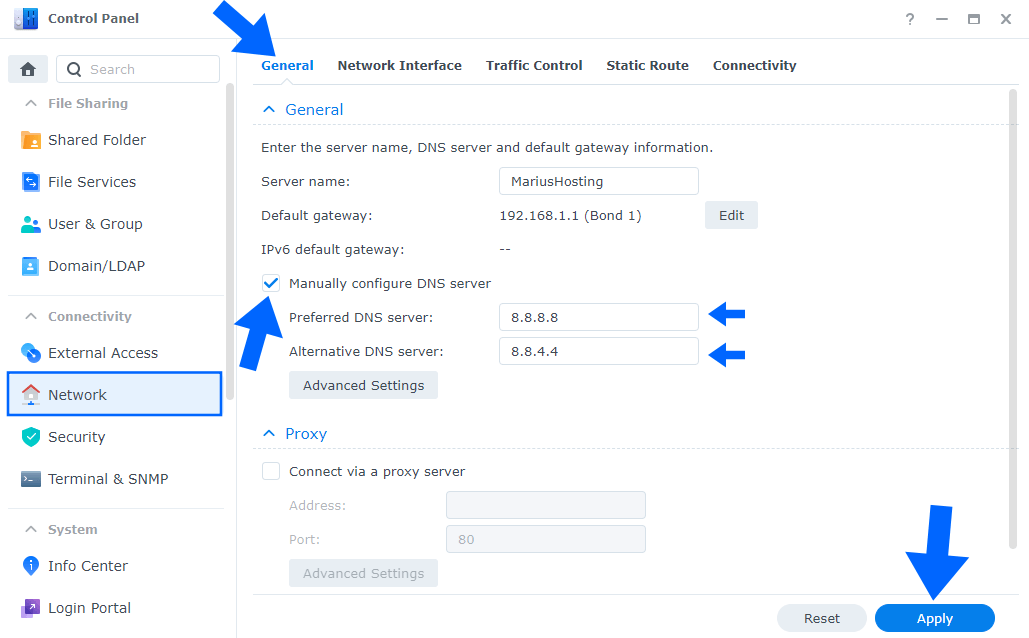
Add Google DNS. Go to Control Console /Network /General. Check "Manually configure DNS server" and add together on Preferred DNS Server:eight.viii.viii.8 and on Alternative DNS Server:viii.8.4.iv Click Use. Follow the instructions in the paradigm below.
-
STEP 4
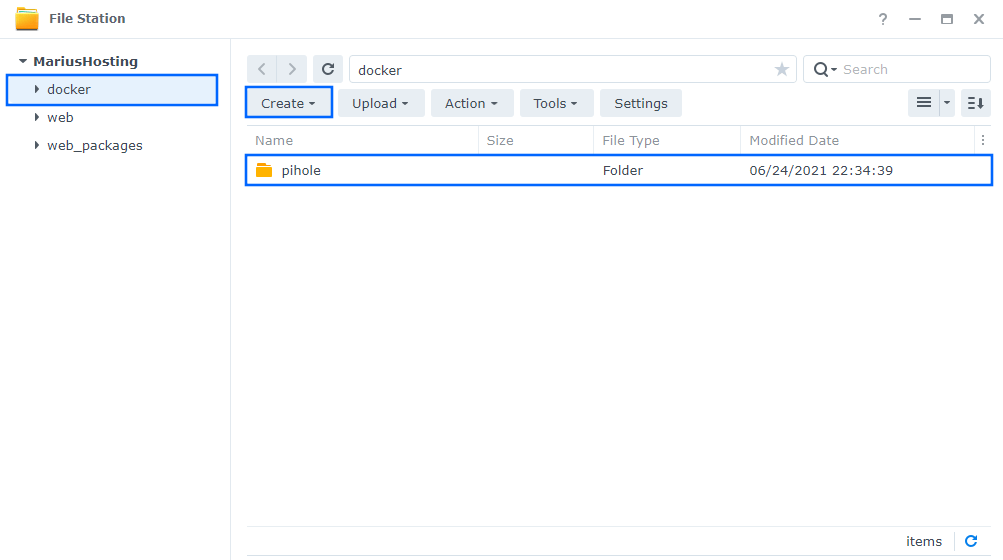
Go toFile Station and open up the docker folder. Inside the docker folder, create one new binder and name itpihole. Follow the instructions in the epitome below.
Note : Be conscientious to enter only lowercase, non capital letters.
-
Stride 5
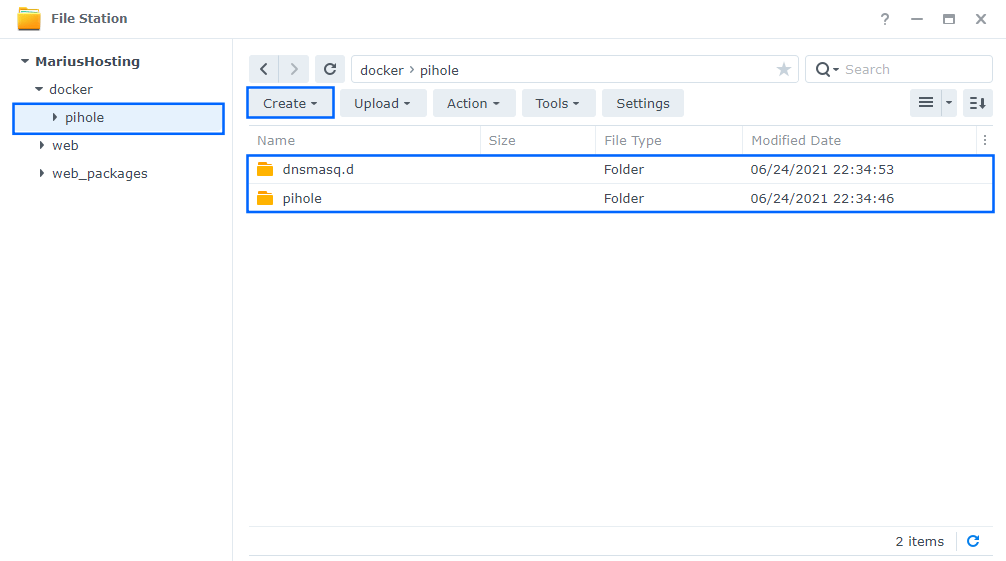
Now create two new folders within the pihole folder that you created at Footstep 4 name one "pihole" and the other "dnsmasq.d". Follow the instructions in the prototype below.
Annotation : Exist careful enter only lowercase, not uppercase letters.
-
STEP half-dozen
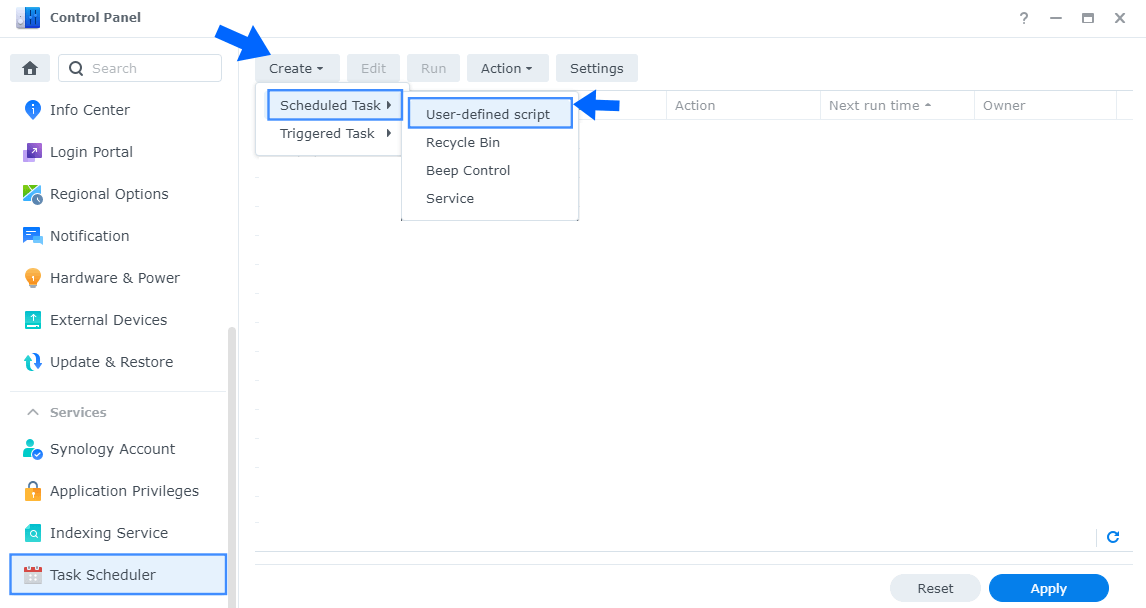
Go toControl Panel /Task Scheduler /Create /Scheduled Chore /User-divers script. Follow the instructions in the image below.
-
Pace 7
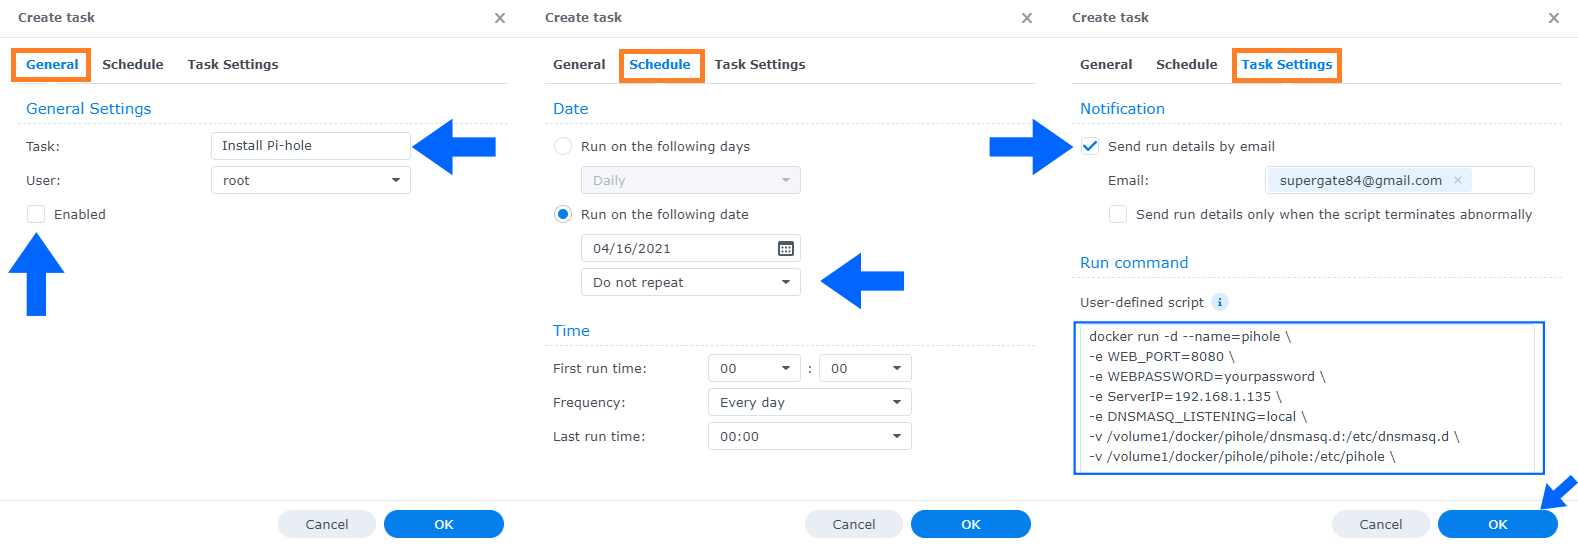
Once yous click on User-defined script a new window will open. Follow the instructions below:
- General: In the Task field blazon in "Install Pi-hole". Uncheck "Enabled" selection. Selectroot User.
- Schedule: SelectRun on the following date then select "Exercise not repeat".
- Task Settings: Cheque "Send run details by email", add together your email and so re-create paste the code below in the Run command surface area. Afterward that clickOK.
docker run -d --proper noun=pihole \ -east WEB_PORT=8080 \ -east WEBPASSWORD= yourpassword \ -east ServerIP= 192.168.1.135 \ -e DNSMASQ_LISTENING=local \ -v /volume1/docker/pihole/dnsmasq.d:/etc/dnsmasq.d \ -5 /volume1/docker/pihole/pihole:/etc/pihole \ --net=host \ --restart always \ pihole/pihole
Note : Before you lot paste the code above in the Run command area, change the value for WEBPASSWORD and add your own password.
Note : Earlier you paste the lawmaking above in the Run control area, change the value for ServerIP and add your own Synology NAS Local LAN IP.
-
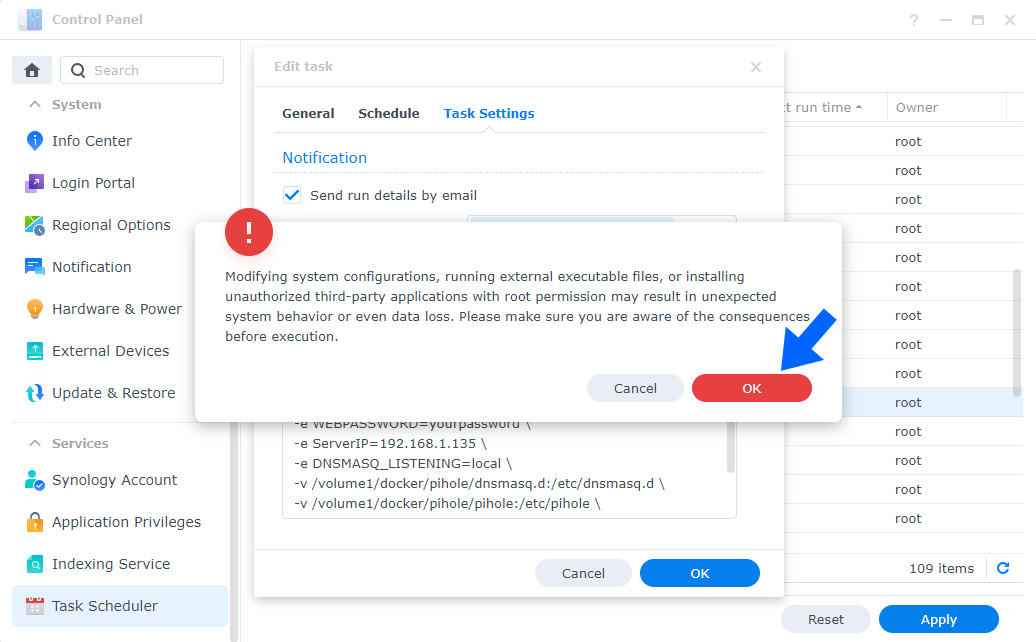
STEP 8
Later on you lot click OK on STEP 7 a new warning pop up window will open up. Click OK.
-
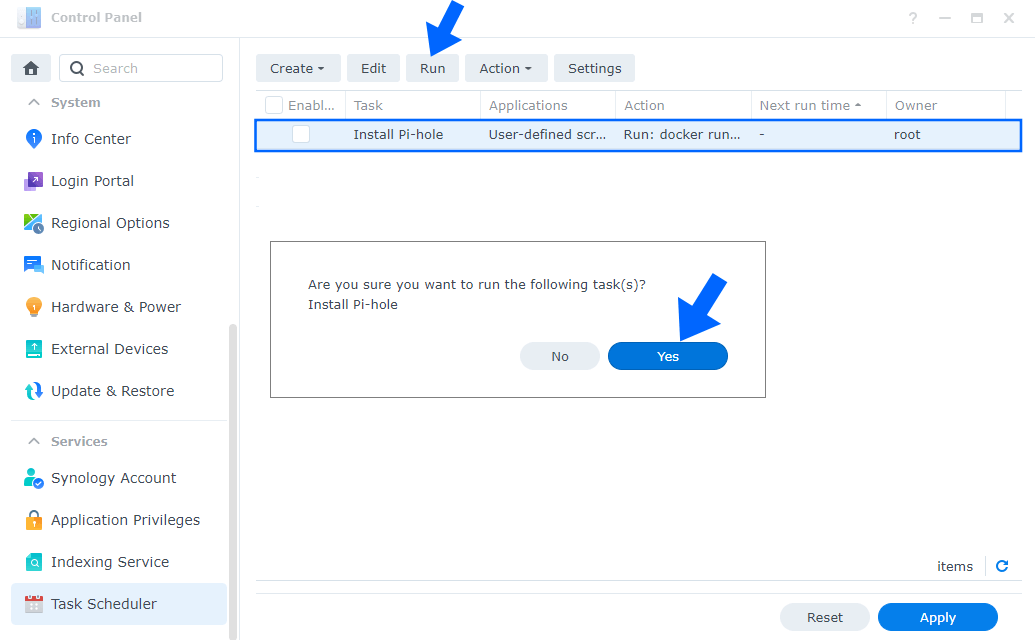
Pace nine
After you click OK on Footstep 8 , select your "Install Pi-hole" Task then click the "Run" tab. Yous volition be asked to run Install Pi-hole – click Yeah. Follow the instructions in the image below.
-
Footstep 10
Get dorsum to STEP 1 or you will deal with karma 🙂
-
STEP 11
The installation process tin take up to a few seconds/minutes. It will depend on your Internet speed connection. Now open your browser and type in http://Synology-ip-address:8080/admin/

-
Footstep 12
On the left Pi-hole sidebar click Login. Type in the password you lot have previously created at STEP 7 . Click Log in. Follow the instructions in the image beneath.

Enjoy your Pi-hole! Ready it up according to your preference.

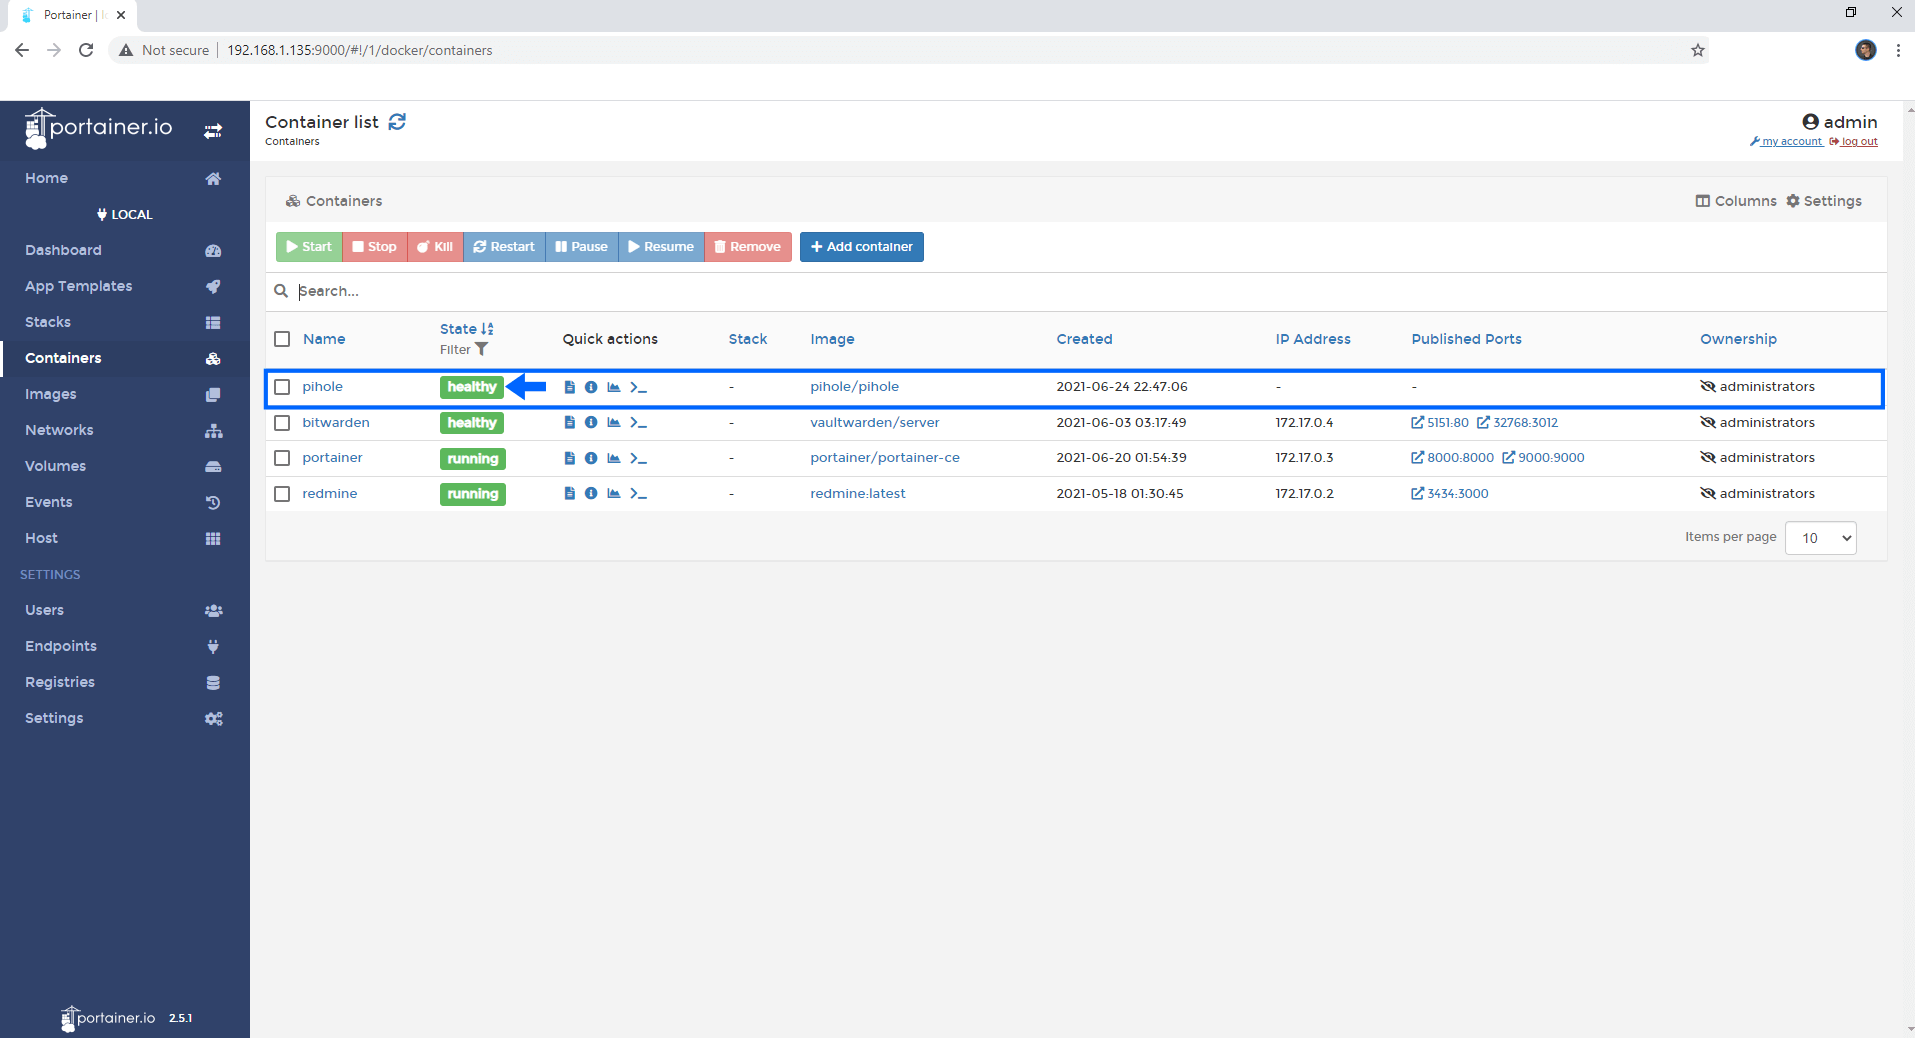
If you lot have Portainer installed on your Synology NAS you lot can likewise see the Pi-hole container perfectly running with the healthy condition.
That's it! I hope this little guide helps y'all install Pi-hole on your Synology NAS.
Note : Many content providers (like YouTube / Reddit / Twitch / Spotify / Pandora / Facebook / Hulu) now stream/serve ads from the same servers equally the content (meaning if you attempt to cake the ads using a Pi-Hole you will too cake the content).
Annotation : If you lot experience connections problems remember to gear up your Synology Firewall in Control Panel / Security / Firewall / Edit Rules / Create Firewall Rules and allow Custom Port 53 Protocol All.
Note : How to Actuate Dark Mode in Pi-Pigsty.
Note : Mandatory is to upgrade your Synology NAS RAM memory. Why exercise yous demand more than RAM? To be more responsive! You lot will non use Synology NAS merely for Docker. Pi-pigsty needs a minimum of 512 MB of RAM (I repeat, a minimum and that'southward simply for Pi-pigsty). If anyone wants to stay within the strict minimum RAM, they are welcome to, but their organization volition never be as responsive equally those which have more RAM installed.
Notation : How to Free Disk Space on Your NAS if Yous Run Docker.
Annotation : Some people may have issues launching Pi-Hole via Docker. This may be because of different settings in your Synology NAS and router. Every user has their own router settings etc. Information technology's really hard to troubleshoot the problem. You can also contact me via email and I will try to find a personalized solution for y'all.
Note : Afterwards installing Pi-hole (through Docker), Synology NAS drives are not hibernating at all. The all-time solution is to Disable Hibernation. This volition exist easier and much more beneficial overall for everything Pi-pigsty needs to read database of filters.
Annotation : Detect out how to update Pi-Hole container with the latest image.
Notation : If someone take a problem once installation is completed, and get an error "This site can't be reached" open up the Pi-hole GUI and go to Settings / DNS tab and in "Interface listening behavior" selection change to Listen on all interfaces, instead of Listen merely on interface eth0. (Reported past jtd).
Note : If your Pi-hole container keeps disconnecting uninstall the Synology Parcel named "DNS Server" which will conflict with Pi-hole on port 53 and don't let your Pi-hole start.
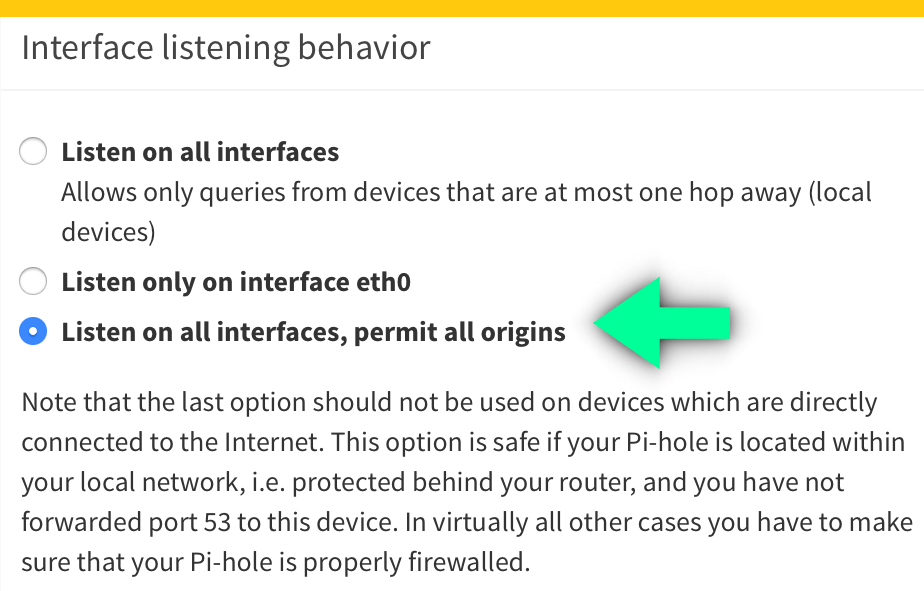
Note : How can I make Pi-Hole work over VPN connexion? Go to Pi-Hole Preferences so check "Listen on all interfaces, let all origins" on "Interface listening behavior". Follow the instructions in the image below:
Notation :Can I run Docker on my Synology NAS?See the supported models.
Notation : At STEP seven you lot can also alter the value variable for the: WEB_PORT – 8080 to 1010 or any you want.
Notation : How to Schedule Commencement & Stop For Docker Containers.
Note : How to Activate Email Notifications.
Note : How to Add together Admission Control Profile on Your NAS.
Annotation : How to Change Docker Containers Restart Policy.
Note : How to Employ Docker Containers With VPN.
Note : Convert Docker See Docker Etch.
This post was updated on Monday / February 14th, 2022 at 10:49 PM

Source: https://mariushosting.com/how-to-install-pi-hole-on-your-synology-nas/
Posted by: kimyage1981.blogspot.com
0 Response to "How To Install Pihole On Windows"
Post a Comment